Sunday, November 30, 2014

Color Crayons & Fabric!

My new favorite thing - embroidery with color crayon tinting! I've put together a little step-by-step of how to color your fabric before you embroider. I hope you find it helpful!

I'm taking a class on this gorgeous quilt - A Gardener's Alphabet from Crabapple Hill. Each block is color tinted, and today I'm working on Block C.  

Whenever coloring your stitchery fabric with crayon, step one is to wash and dry your fabrics without using any softener. Press your fabric.

Now tape your pattern to a light box or a sunny window, and use a fine-tip Pigma pen to trace out the pattern. Avoid water- or air-erasable pens as these can be permanently set into your fabric when you heat-set the color later on. 

Prepare a clean, smooth surface on which to color. Trim away loose threads, and give yourself ample space. 

Tint everything that you will color in WHITE. This fills in those little fabric pores and gives you a nice base over which to color.

Next, pull out the crayons and embroidery floss that you'll be using in order to decide on colors ahead of time. The pattern tells you which colors to use so make sure you have those handy and that you like the combination. Don't be afraid to change it up!

Here I pulled out the floss and the crayons, and then I put them together to make sure I liked the pattern's suggestions. I did!

Experiment, experiment, experiment. Always have a scrap of your background fabric on hand to play with before coloring your actual block.

Begin with your lightest shade of crayon, and get darker as you go. You can always go darker, but it's pretty hard to go lighter! I color everything in - sort of a second "base" of color - before I begin to shade. And you can always leave some parts white. Where light hits an object, it often looks white. Remember - you can always darken it in later on!

Now this is where we get into shading. A little planning is helpful. Just remember that objects in the foreground tend to be lighter than those in the background. The edge of an object, where is sits behind another, is often darker. In this example, I think of the area below each line on the carrots as being shaded, therefore darker. Here's what I mean:


Next come the greens, and I just followed the same process, going light to dark.

 I colored in the Letter C as the pattern suggested, and my coloring was complete!

Now it's time to heat set. Place a clean paper towel over your project, and press with a hot iron, without using steam. Lift up the towel, and if it's completely free of crayon, your done! If not, repeat with a clean towel until the towel comes back clean.

Now here's the block after heat setting. The heat helps to smooth the color, giving it a nice finished look.


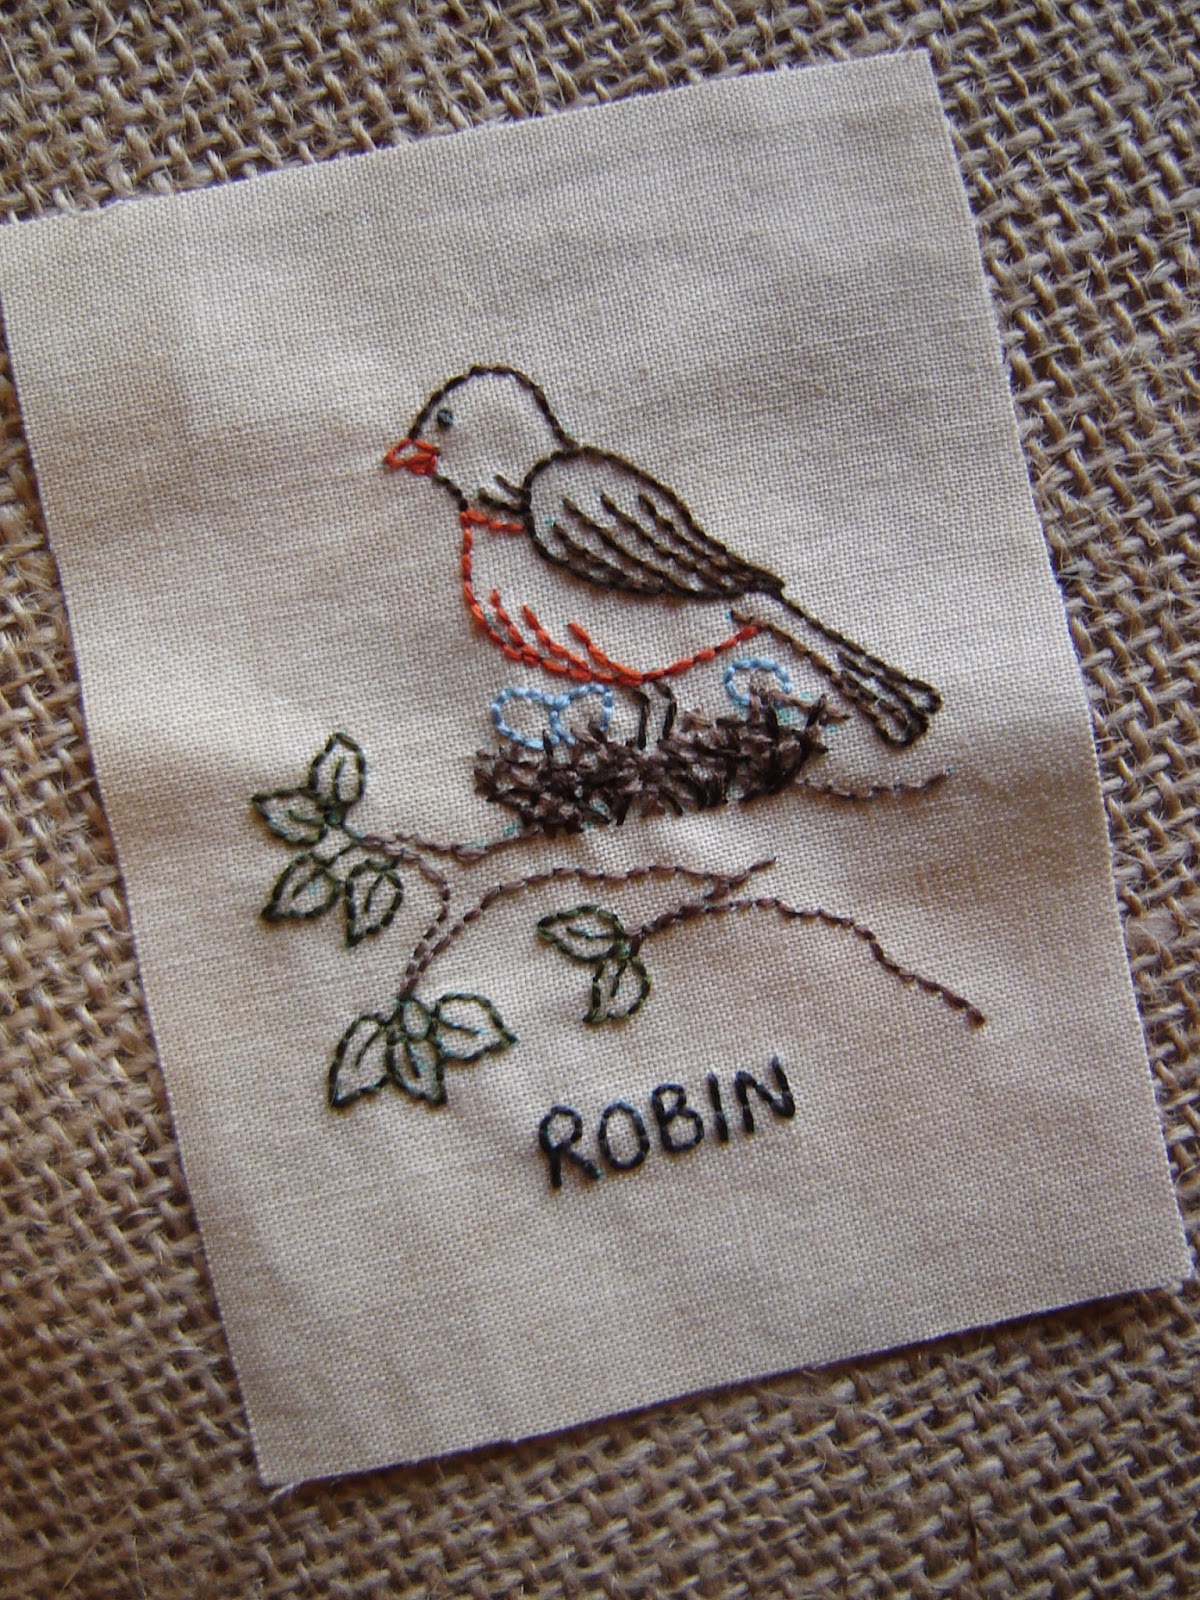
Now layer your stitchery over a background piece of muslin (also pre-washed); baste; and embroider!

So what do you think? Not too hard, right? Everyone's block will look different, and that's the best part of being creative. Hope you have fun, and contact me anytime with questions, comments, ideas... I'd love to hear from you!
Sara

Monday, November 24, 2014

Metallic Hand Embroidery Floss

Hey All!

I LOVE working with metallic embroidery floss. Well, I don't exactly love working  with it, but I do love its effect. It can be tricky! So I've put together a few tips to help you work with the stuff.

First off - it's kind of difficult! No two ways about it, it just is. You have to have a little extra patience to work with metallics. But they add so much to a project, that I think they're worth it. Here are a few things I've done with metallic hand embroidery floss.

On A Patchwork Forest, I used a blue metallic floss to give the embroidered snowflakes a little sparkle.

On All is Bright, the metallic gold gives the project and old-fashioned Christmas card look.

And on Christmas by the Fire, the metallic golds and copper set the fire aglow.

My patterns call for DMC metallic floss. There are other brands out there, but DMC is just the one that I've tried. I like their colors and availability. Here are a few I've picked up at local craft stores.

Below is a picture of what happens to the ends of this floss. It frays like crazy! Just be aware of that, and USE SHORT STRANDS. Plan to cut your floss to no more than 15" or so. It takes a little extra time when you need to re-thread the needle, but the overall frustration level will be less - trust me! And TRIM THE LOOSE END AS YOU GO to prevent it from getting all knotted up. You'll lose some length, but the look will be cleaner.

USE A NEEDLE WITH A LARGE EYE. I like to use a chenille needle like the one pictured on the bottom. The metallic-ness (my new word) holds together better when there's less friction against the needle. I think this is the most important tip of all!

PLAN ON THERE BEING A LITTLE WASTE. It' hard to store this stuff once it's been separated! DMC metallics come in 6-strand skeins, and if you don't use all six strands for a project... well... those leftover strands end up looking like this - pretty but not all that functional. When I start a new project, I always start with a fresh strand of floss.

I like to store all of my embroidery floss like this. Pick up these little PLASTIC FLOSS BOBBINS at most craft and sewing stores. And be sure to LABEL THE BOBBIN with the floss color so you can easily find it for your next project.

SEW SLOWLY! In this picture, you see what often happens as you embroider. The strands separate. Now you can try different methods of knotting to alleviate this, but I find that just going slowly, and taking the time to pull individual strands through when necessary, is the way to go. It's just a matter of being patient and knowing that the end result will be worth it!

If you're a machine embroiderer, I came across this helpful tutorial from Nancy's Notions. I haven't done any machine embroidery myself, but I think her tips make a lot of sense.

So there you go! If you have any questions, don't hesitate to shoot me an email. I'd love to hear from you!

Sara

Saturday, November 22, 2014

Blog Hop WINNERS!

Ladies and Gentlemen... We have our three Quiltmaker 100 Blocks Vol. 10 Blog Hop winners!
Amy Caldwell: Blog Post Winner of Vol. 10
Sheri Levesque: Facebook Post Winner of Vol. 10 and a pattern
Debbie Markowitz: Facebook Like Winner of Vol. 10 and a pattern

THANK YOU EVERYONE for participating! My favorite part of social media is hearing from all of you and getting your input. I really value your comments and suggestions. Leave them anytime!!

Winners, please email me with your addresses - sara@blueberrybackroads.com

Sheri and Debbie, go to my website - www.blueberrybackroads.com - and let me know which pattern I can send along with your Vol. 10.

I want to wish all of you a lovely weekend and very happy Thanksgiving! Enjoy your family time, delicious food, and maybe a little time curled up on the couch with some handwork. 'Tis the season after all!

Take care,
Sara

Monday, November 17, 2014

BLOG HOP! Quiltmaker's 100 Blocks Volume 10

Welcome to Blueberry Backroads!

I'm Sara, and I'm thrilled to have my block chosen to appear in Quiltmaker's 100 Blocks Volume 10. Embroidery is my game, and I hope you love it too!

Scroll to the bottom to learn about THREE WAYS TO WIN your free issue of Volume 10!

Here's my block - Winter Red -
I was inspired to design this block by the beautiful variegated grey embroidery floss. This past year I've been experimenting with different brands and colors of floss, and I've fallen in love with the variegateds!

I like to use a water-erasable fabric pen to trace out my patterns. That way I can make mistakes, go outside the lines, play with the look, and it all disappears with the dab of a damp cloth when I'm done.

Chain-stitching is the name of the game!

Now for your chance to win...
Leave a comment on this post, and you'll be entered to win a free issue of Quiltmaker's 100 Blocks Vol. 10. I'd love to hear what your favorite embroidery floss is, but any and all comments are welcome!

And for two more chances to win...
Go to Blueberry Backroads' Facebook Page. LIKE our page, AND leave a comment on today's post. BOTH will be entered into a drawing to win Volume 10 as well as any pattern of your choice from our website! (If you've already liked our page, don't worry - you'll be entered too!)

Enjoy the rest of the Blog Hop by visiting Quiltmaker's 100 Blocks Volume 10, and check out other designers' beautiful creations.

Thank you for travelling the Backroads!
Sara

Thursday, November 6, 2014

New Wintertime Patterns

Hello hello! Hope you all had a fun filled Halloween. I went out to South Dakota and went trick-or-treating with my nieces. It's my favorite holiday to spend with them! What could be cuter?

I'm releasing four new patterns this week! The theme... snowmen of course! :)

#073 - Winter's Windows
15" x 21 1/2"
$8.00
#074 - The Flurry Family
18 1/4" x 24"
$8.00

#075 - Play... Snowball!
12 1/2" x 14 1/2"
$8.00

#076 - Season's Greetings
As featured in Quiltmaker's 100 Blocks Vol. 9
12 1/2" x 12 1/2"
$8.00
Happy stitching everyone!
Sara

Tuesday, October 14, 2014

Name that Pattern

Hey All,

Hope you're enjoying some beautiful fall weather, maybe working on some fun fall projects. Me, I'm into designing for winter and Christmas patterns right now. It's probably the easiest time for me, as I love to draw snowmen!

I have a new one, just completed today. I still have to write the pattern, and I'm looking for your help! Go to Blueberry Backroads' Facebook page, and name the pattern - under the October 14th post. If I choose your pattern name, I'll send you a free pattern - any one you like from my website!

And while you're there, don't forget to LIKE US and never miss out on new pattern announcements, show dates, and more.


Thank you for your help! I look forward to hearing from all you creative souls!
Sara

Saturday, September 27, 2014

New Holiday Patterns

A couple more patterns - complete! These are my two newest - for those of you who love to get a jump start on everything holiday related.
#068 - A Joyful Holiday
Happy Holidays: 10 1/2" x 15 1/2"
Joy: 7 1/2" x 8 3/4"

#072 - Wintertime Sampler
13" x 13"
Visit our website to see all our patterns and to place an order.

Now I'm off to enjoy some BEAUTIFUL 75 degree weather! Have a great weekend!
Sara

Thursday, September 25, 2014

I Love to Color!

I have a new favorite thing! COLOR CRAYONS!
I went nuts and bought the bonus box. Who doesn't need 96 color crayons??!!

Last week I started taking a class at a most fantastic quilt shop in my neck of the woods - The Noble Quilter in Elk River, Minnesota. The project - A Gardener's Alphabet, designed by Crabapple Hill, taught by the very talented Connie Chapman. Here's a picture of her completed quilt, hanging up at The Noble Quilter. This is what I'm aspiring to!

I got started today with the color crayon portion of the project, AND I AM CRAYOLA'S NEW BIGGEST FAN. Here's a little step-by-step of how I colored Block A.

As the pattern highly recommends, I first colored in everything with a white crayon. This seems to add a nice base over which to color. It fills in the muslin fabric's "pores", providing a nice, smooth surface. And then I chose my greens, and started to fill in those leaves! Connie suggested starting with the lightest color, then shading with darker and darker colors. And it really seemed to work!

On to the pumpkin. I started out by coloring it in with gold, then shading with orange, and then brown (light to dark).

I'm amazed by how much dimension the brown gives!

And finally, I colored in the letters and Little Miss Butterfly.


Next - I embroider! I can't wait to sit down this evening and get started.

On a side note, check out this rainbow that my 3-year old niece, Isla, drew. I think it's the most adorable use of color I've ever seen. If my sister doesn't convince her to draw me one of these soon, I have no qualms about stealing this off her fridge!

Tuesday, September 2, 2014

New Patterns are In!

Hey All! 

Hope you had a fantastic Labor Day weekend. The Minnesota State Fair was going on so we made a couple trips there and indulged in cheese curds, salted nut rolls, turkey sandwiches, unlimited MILK (love MN!), etc, etc. 

Back to work this week, and we have three new patterns available!
#069 - Early Riser
$8.00
#070 - Bird Lovers Sampler
$8.00
#071 - Pumpkin Peddler
$9.00
Give us a call - 218-230-4801 - or send us an email to place an order. Thank you!
Sara

Tuesday, August 5, 2014

Time for YOU to Vote!

Remember those birdies from my last post? Well, they've really started to take shape! Here are the four little blocks that I'll be turning into a wall hanging.


And now it's your turn to vote! Go to our Facebook Page, and vote on today's post. Which birdie is your favorite? The favorite bird on Facebook will be made into a little pillow as part of the pattern!

And don't forget to LIKE Blueberry Backroads when you stop by. Can't wait to hear from everyone and tally the votes! Getting your feedback is one of my favorite things about social media. I love to hear from you!

Sara